How you connect decides what the assistant can see, so pick the method before
the client. See Authentication for what the two mean in
practice.
Your assistant
OAuth, scoped to you
API key, scoped to the workspace
Claude, ChatGPT
Yes
Not supported
Claude Code, Codex, Cursor, Gemini CLI, VS Code, Windsurf
Yes
Yes
Claude and ChatGPT only ever act as you. The editor and terminal clients support
both, and the difference is one line of config: leave the credential out and the
client signs you in over OAuth, supply one and the client reaches the whole
workspace.
Nothing to create in NeetoForm beforehand. You give the client the server URL and
approve the connection in the browser.
Claude
ChatGPT
Claude Code
Cursor
Gemini CLI
Codex
VS Code
Windsurf
NeetoForm is added as a custom connector, so you paste the server URL
yourself. Custom connectors work on claude.ai, in the Claude desktop app, on
Claude mobile and in Cowork. The steps below are the same in all four, and a
connector you add in one shows up in the others.
The menu under Add in Claude's Connectors settings.
Browse connectors, the other item on that menu, opens Anthropic’s
connector directory. NeetoForm is not listed there, so take Add custom
connector.
Give it a name and paste the server URL:
https://connect.neetoform.com/mcp/messages
Leave Advanced settings alone. The OAuth client id and secret there
are for servers that cannot register clients on their own, and NeetoForm
does that automatically.
Custom MCP servers are added through developer mode.
Open Settings → Security and login and turn on Developer mode. The
Plugins settings section links straight to it.
Go to Plugins, click Browse plugins, then the plus button.
In New Plugin, enter a name, set Connection to Server URL, and
paste:
https://connect.neetoform.com/mcp/messages
Leave Authentication on OAuth. ChatGPT reads NeetoForm’s OAuth
settings from the URL, so Advanced OAuth settings needs nothing from
you.
Tick I understand and want to continue, then click Create and
approve the NeetoForm sign in.
OpenAI documents the current steps in
Building MCP servers for plugins and API integrations.
They renamed the app directory to the plugin directory in July 2026, so older
walkthroughs may say “apps” or “connectors” where the UI now says “plugins”.
Add the server without a header. The missing credential is what makes Claude
Code sign you in rather than send a key.
claude mcp add --transport http neetoform https://connect.neetoform.com/mcp/messages
Run claude mcp list and the server reads Needs authentication. Start
Claude Code, run /mcp, pick neetoform, and complete the sign in in the
browser.
Add the server to ~/.cursor/mcp.json, or to .cursor/mcp.json for a single
project, with no headers block:
Restart Cursor, then approve the NeetoForm sign in when it prompts.
Add the server to ~/.gemini/settings.json, or to .gemini/settings.json
for a single project, with no headers block. Streamable HTTP servers go
under httpUrl, not url, which Gemini CLI reserves for SSE:
Gemini CLI starts the sign in when the server answers with a 401 and
registers itself automatically.
Codex uses TOML rather than JSON. Add the server to ~/.codex/config.toml,
or to .codex/config.toml for a single project, with no credential fields.
OAuth is what Codex falls back to when none are given:
Whichever client you started from, NeetoForm runs the same steps.
1
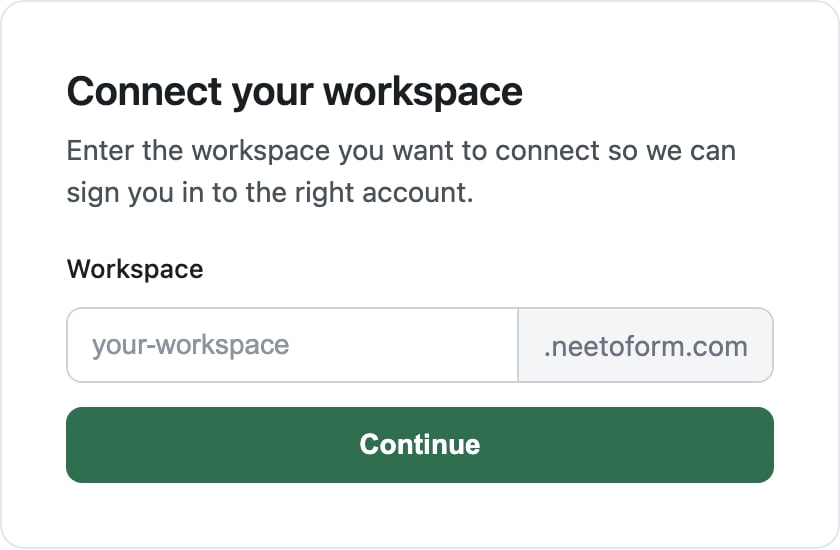
Choose your workspace
Enter the subdomain of the workspace you want the assistant to reach. For
acme.neetoform.com, enter acme. See
Workspace subdomain.
The first screen of the NeetoForm OAuth flow.
2
Sign in
Sign in to that workspace if you are not signed in already.
3
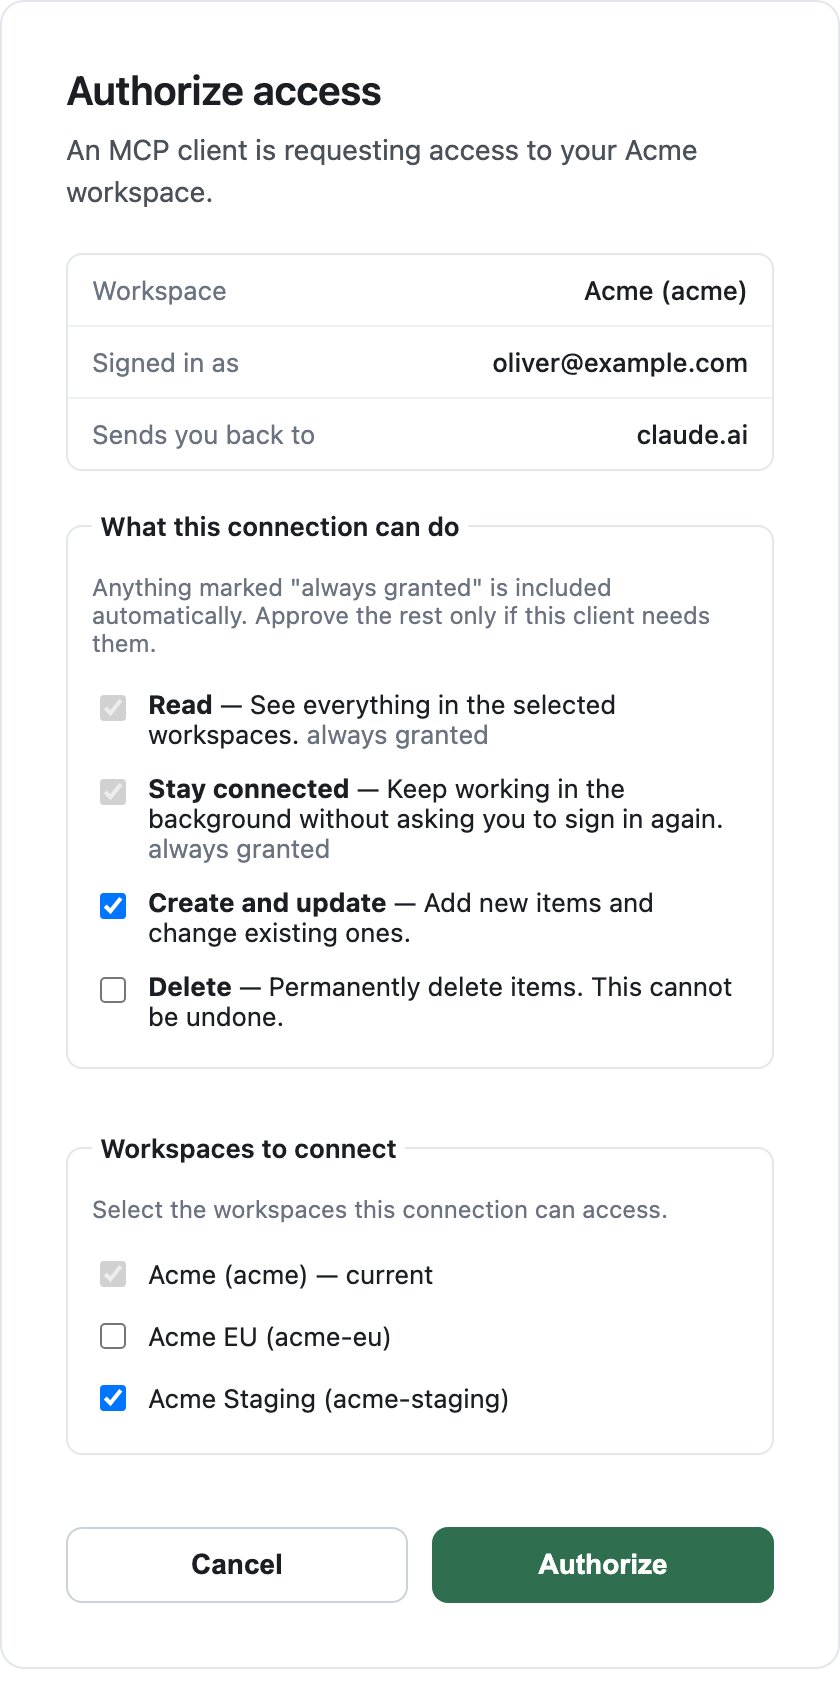
Check what you are approving
What this connection can do lists the four permissions. Read and
Stay connected are always granted and cannot be unticked. Create and
update and Delete are yours to tick, and a tool that needs one you did
not grant is refused when it is called. See
What you approve.Workspaces to connect lists every workspace your email belongs to. The
one you just signed in to is ticked and cannot be unticked. Tick any others
you want the same connection to reach.That list only appears when your email belongs to more than one workspace.
With a single workspace, the screen goes straight from the permissions to
the buttons.
The Authorize access screen, with the permission picker above the workspace list.
4
Authorize
Click Authorize. The assistant is granted access as you, with your own
permissions and no more than you ticked, to each workspace you ticked.
There is no API key to create for this route, and nothing to paste back into the
assistant.Once connected, name the workspace in a prompt when you want a specific one. To
add a workspace later, run the sign in again and tick it.
The same six clients, configured with a key instead. Every tool call then reaches
the whole workspace rather than only what you can see, which is what you want for
automation and not what you want on a shared machine.
Claude Code
Cursor
Gemini CLI
Codex
VS Code
Windsurf
Add the server to ~/.claude.json under mcpServers:
Export NEETOFORM_API_KEY in the environment Codex runs in.
Unlike the other clients, this config lives inside your project rather than
your home directory, so a pasted key can end up in a commit. Add
.vscode/mcp.json to .gitignorebefore you create the file.Better still, leave the key out of the file entirely: omit the headers
block and VS Code signs you in over OAuth, which
needs no secret in the project at all.
Once .vscode/mcp.json is ignored, create it in your workspace. VS Code
nests servers under servers, not mcpServers, and an inputs entry is
what keeps the key out of the file:
This needs VS Code 1.99 or later with GitHub Copilot in Agent mode. Written
this way, VS Code asks for the key the first time the server is used and
stores it itself. Paste the key straight into headers instead and it is
read from the file without any prompt, which is the case the warning above
is about.
Add the server to ~/.codeium/windsurf/mcp_config.json. Windsurf uses
serverUrl rather than url:
Enable the server under Settings → Cascade → MCP Servers. Windsurf allows
at most 100 tools across every connected server, so disable servers you are
not using if NeetoForm’s tools do not appear.
Replace YOUR_API_KEY with a key from your workspace. See
Authentication.
Ask the assistant something only the server can answer, for example
“List the active forms in my NeetoForm workspace.” If it answers with real forms,
the connection works. If it does not, see Troubleshooting.